
If you're looking to have fun with your little girl this summer then I have the perfect DIY for you!
Paint a butterfly on her face.
If she's like my little girl, she will absolutely LOVE it!
Best of all, you don't have to wait in any hot lines at a fair!!
Alright, are you ready? Here we go...

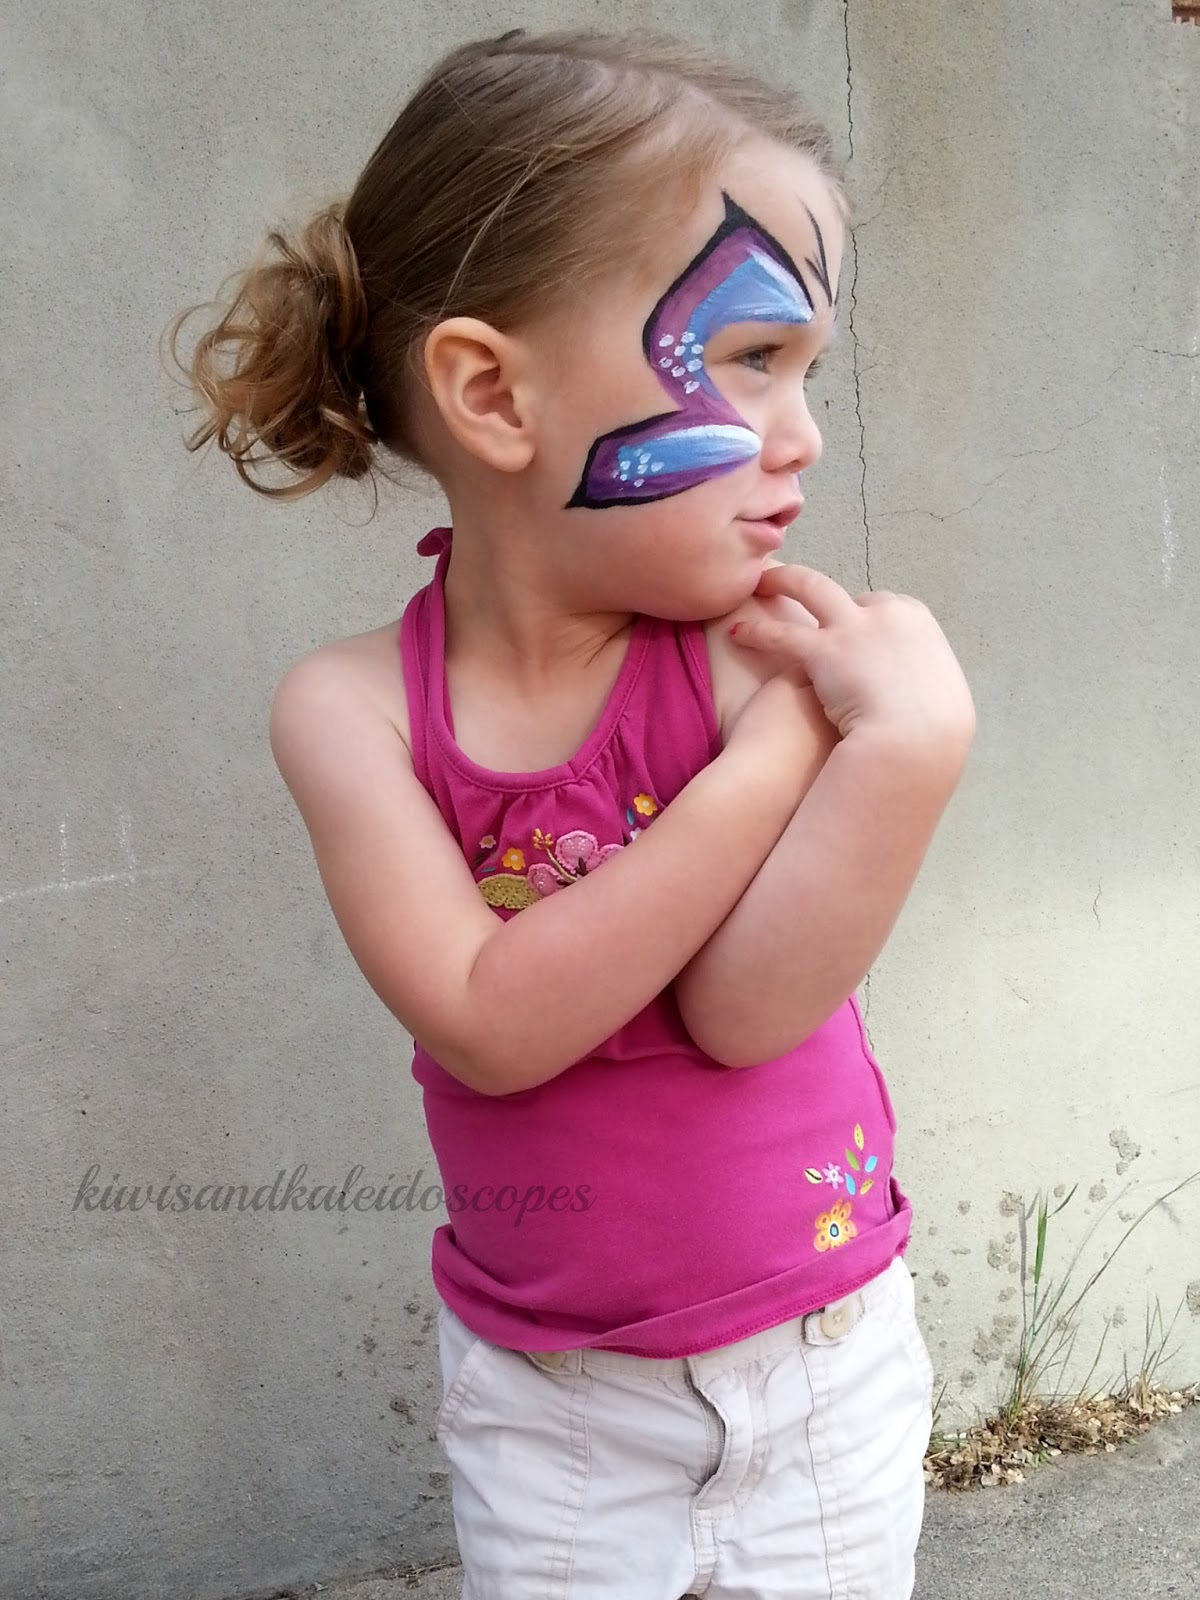
1. Use purple face paint to create a shape similar to the number two. I started above her eye and created a triangle that slanted up and out.
I swooped down around her eye and along her cheek until it reached the same height as her nose.
From there I angled down towards her jawline. Almost in line with the bottom of her earlobes.

2. Once the purple has dried, use blue.
I started at the center of her face by her eyebrows. I made a smaller triangle that swooped down to the bottom of her and thinned out.
Then I did the cheek, starting at the point closest to her nose I made an elongated triangle. I followed the lines I made with the purple, but brought them in by a couple of centimeters.

3. Then I added white.
I started up at the eyebrows again. I just made a few white lines and flared them out, all starting at the same point.
Then I did the same thing on the cheeks starting next to the nose.
Finally I added random spots of white by each point next to her brows, on the outer edge of her eyes, and at the bottom point of the wing.

4. Last, but not least. I added a black accent.
I started at the brows and flared it up and out, almost like a cat-eye.
Then I came down along the edge to her eye-line and thinned it out.
I started at the crease between the wings and brought it along the edge to the lowest point and created another exaggerated point.
Finally, I brought it up along the bottom of the wing and ended about 1.5 inches from the inner edge of the wing.
I tried creating a swoopy antennae, but my daughter just couldn't sit still any longer. I ended up erasing it (a million times), and decided just to do straight lines. I added a few in each direction. I did one main long one, one of medium length on the bottom, and a short thin line in the middle.
I tried creating a swoopy antennae, but my daughter just couldn't sit still any longer. I ended up erasing it (a million times), and decided just to do straight lines. I added a few in each direction. I did one main long one, one of medium length on the bottom, and a short thin line in the middle.
I created the identical look on the opposite side. I did not connect the antennae on both sides. I left a 1-2 cm gap.
But you can do it however you'd like. Be creative and free with your design. This is just what I liked and what worked easiest for me.
That's it!
4 colors and you're done!
I only used the paintbrush to create this look.
If you want the same face-painting kit that I used, you can find it HERE.

No comments:
Post a Comment